Welcome to Stintly™. This guide walks you through everything you need to do on your first day with the app — from setting up your business profile to understanding the dashboard and exploring each section. By the end, you'll be ready to send your first invoice.
First Launch
When you open Stintly for the first time, you'll land on a brief welcome screen that asks for your business name. This name appears on every invoice and estimate you send, so enter it exactly as you want clients to see it (e.g., "Jane Smith Consulting" or "Bright Loop Design LLC").
After entering your business name, Stintly takes you straight to the Dashboard. No account creation, no email verification — just your data, on your device, immediately.
Setting Up Your Business Profile
Before you send anything to a client, take two minutes to fill out your business profile. Go to Settings → Business Profile and fill in:
- Business name — pre-filled from setup, but editable any time
- Your name — shown as the contact person on invoices
- Email & phone — so clients know how to reach you
- Business address — required for professional invoices and some tax forms
- Logo — tap to upload a PNG or JPEG from your Photos library; appears at the top of every invoice PDF
- Payment details — add your bank transfer info, PayPal handle, Venmo, or any payment link you want clients to use
A complete business profile makes every invoice look professional from the start and eliminates repetitive data entry.
Understanding the Dashboard
The Dashboard is your financial command center. Every time you open Stintly, this is where you land. Here's what each number means:
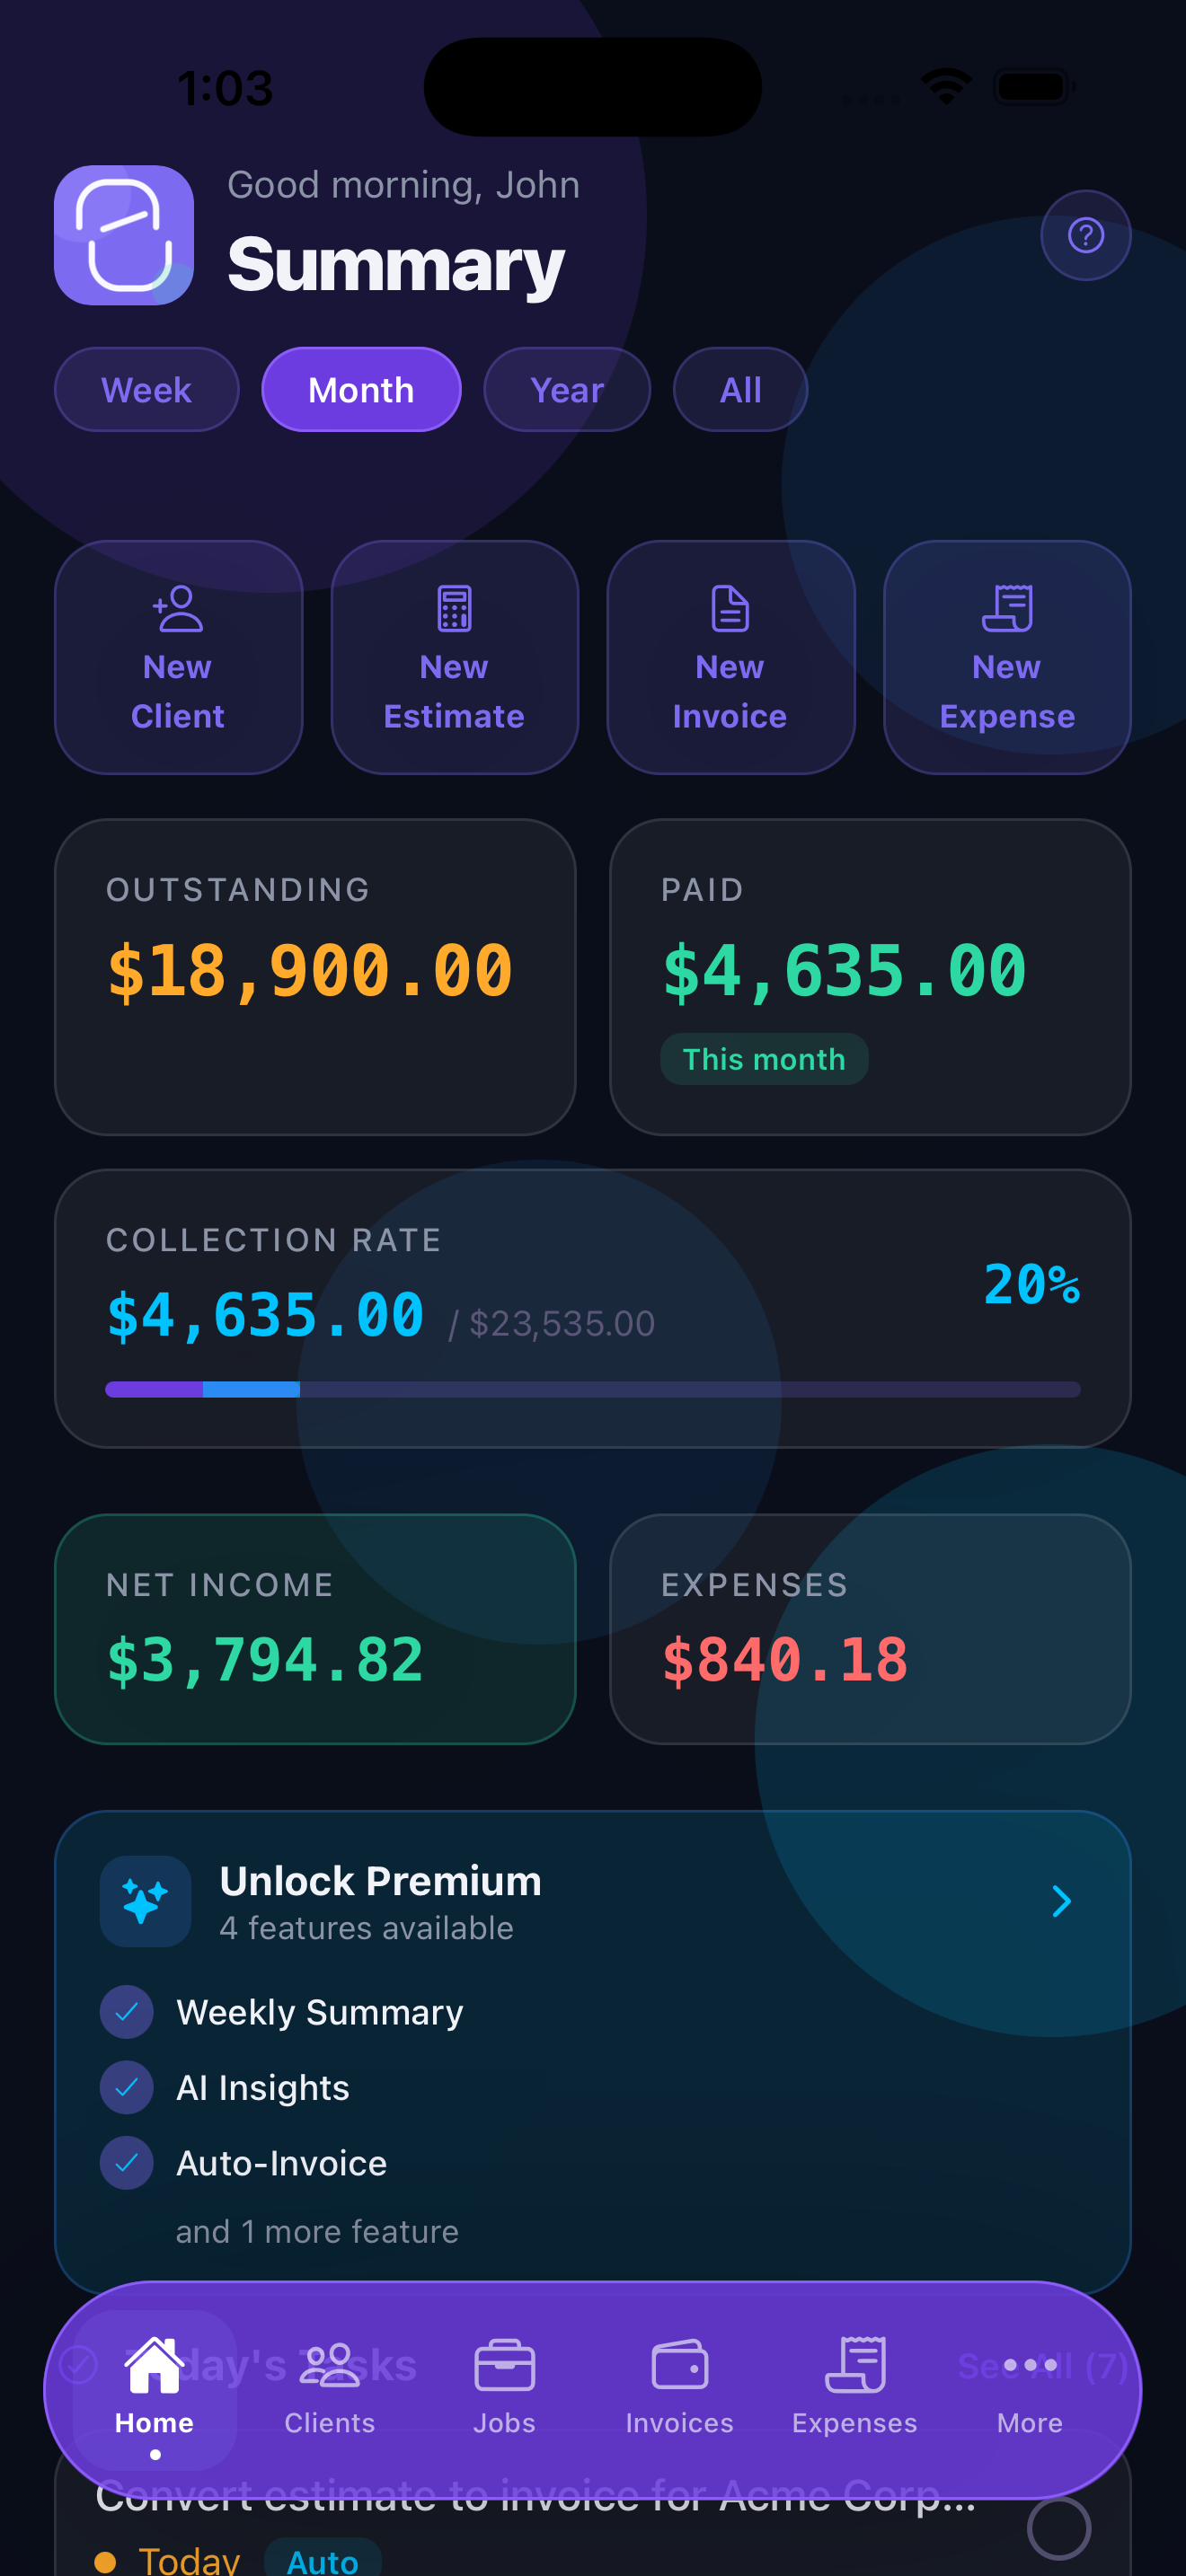
- Outstanding — the total amount across all unpaid invoices (Draft + Sent + Overdue). This is money you've earned but haven't collected yet.
- Collected — the total amount marked as paid in the current period. Tap to filter by month, quarter, or year.
- Collection Rate — the percentage of invoiced amounts that have been paid. A healthy freelance business typically runs above 90%. If yours is lower, you may need to send more follow-ups or tighten your payment terms.
- Net Income — your collected revenue minus your logged expenses for the selected period. This is the number that matters most come tax time.
Below the summary cards you'll see a list of recent activity — newly created invoices, payments received, and upcoming due dates — so you always know what needs attention today.
Navigation Overview
Stintly is organized into nine sections accessible from the tab bar at the bottom of the screen:
- Dashboard — financial summary and recent activity (you are here)
- Invoices — create, send, and track all invoices and estimates
- Expenses — log and categorize every business expense
- Clients — manage your client list; tap any client to see their full invoice and payment history
- Jobs — organize work by project; track time, attach invoices, and log expenses per job
- Reports — income vs. expense charts, effective hourly rate, tax summaries, and CSV exports
- Tasks — a lightweight to-do list tied to jobs and clients
- Calendar — see due dates, job deadlines, and scheduled tasks in a calendar view
- Settings — business profile, invoice templates, notifications, backup, and Premium features
Privacy & Data Storage
All your data — clients, invoices, expenses, time logs, and reports — is stored entirely on your device. Stintly does not send your financial data to any server. There is no cloud account, no subscription login, and no third party that can access your records.
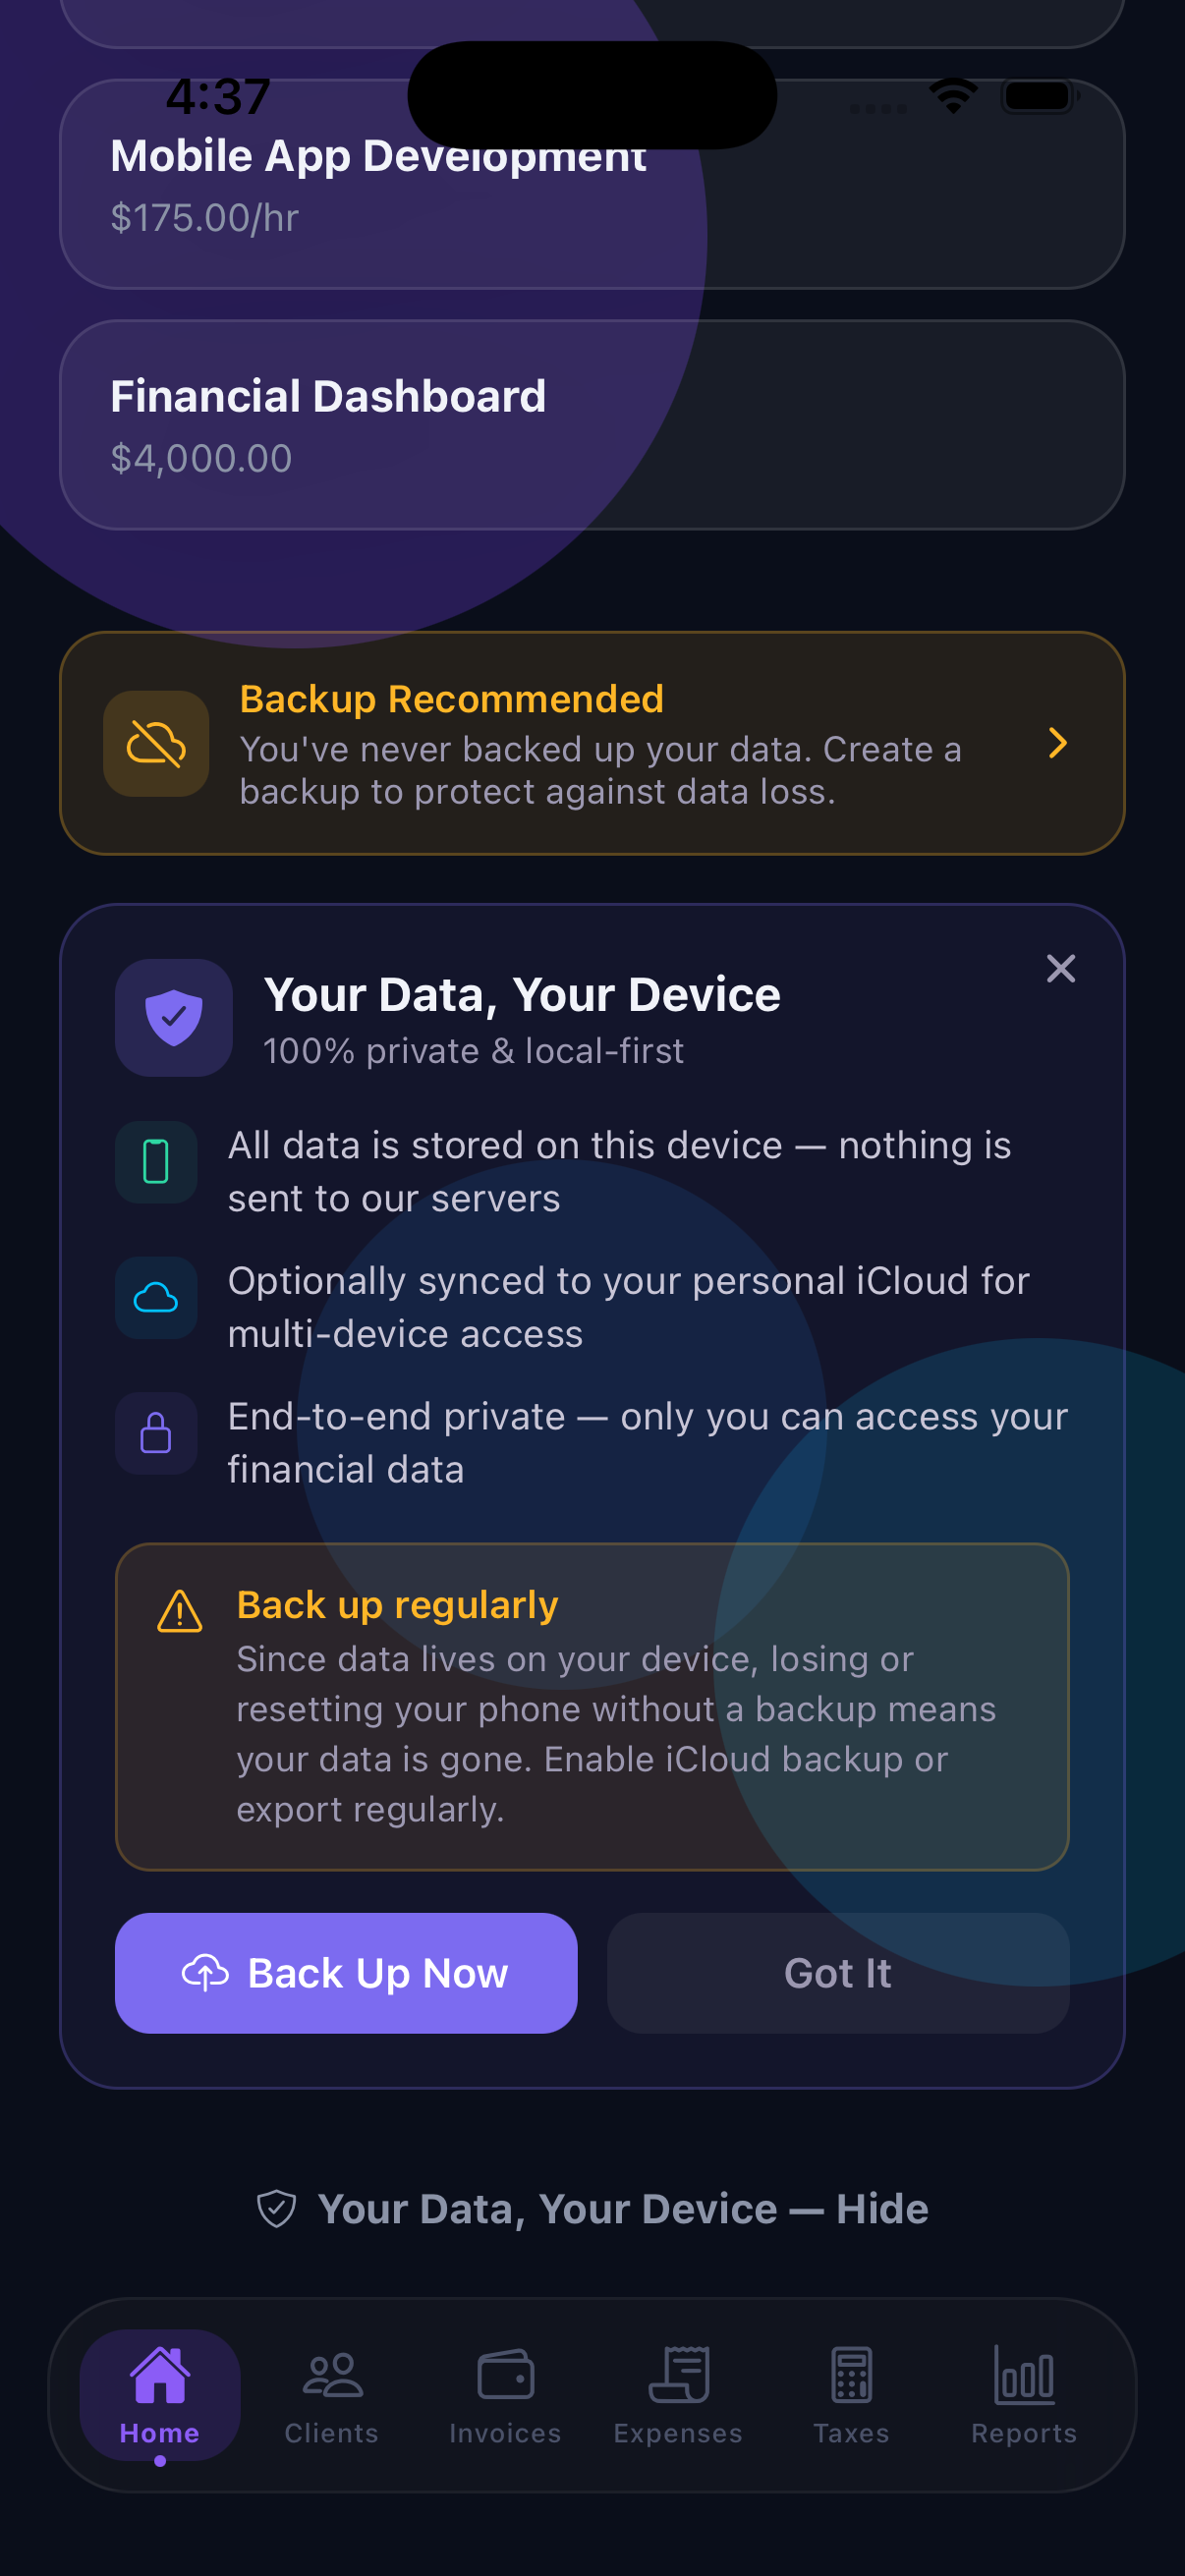
For backup, Stintly integrates with iCloud. When iCloud backup is enabled, your Stintly data is encrypted and stored in your personal iCloud account — not Stintly's servers. To enable it, go to Settings → iCloud Backup and toggle it on. Your device's iCloud settings must allow Stintly to use iCloud Drive.
Your financial data is yours. Stintly never sees it, sells it, or stores it anywhere outside your own devices.
Tips to Get the Most Out of Stintly™
- Enable notifications right away — go to Settings → Notifications and turn on invoice due-date reminders and overdue alerts. You'll never miss a follow-up again.
- Set up iCloud backup immediately — before you enter any client or invoice data, turn on iCloud backup in Settings. This ensures you never lose your records if you get a new phone.
- Add your first client before your first invoice — having a client record set up makes invoice creation much faster. Go to Clients → + and add their name, email, and billing address.
- Explore AI features — if you have Stintly Premium, try the AI invoice generator, voice expense entry, and smart receipt scanning. These features can save several minutes per transaction when you're billing dozens of clients.
- Check your Collection Rate weekly — it's the single best indicator of your billing health. A dropping rate usually means invoices are going out but follow-ups aren't.
Ready to take control of your freelance business?
Download Stintly free on the App Store. No account required — start invoicing in under two minutes.
Download on the App StoreNext up: learn how to create and send your first invoice.